
How to Set Up a Home Art Studio with Perfect Natural Lighting for Painting?
In the world of art, lighting is a crucial element that can enhance or detract from your creative process. Whether you’re a seasoned artist or just starting, having a well-lit studio is vital for creating your best work. In this article, we will guide you on setting up a home art studio that utilizes natural light effectively for painting. We will explore different sources of lighting, how the color and temperature of the light affect the painting process, and how to choose the right light bulbs for your studio.
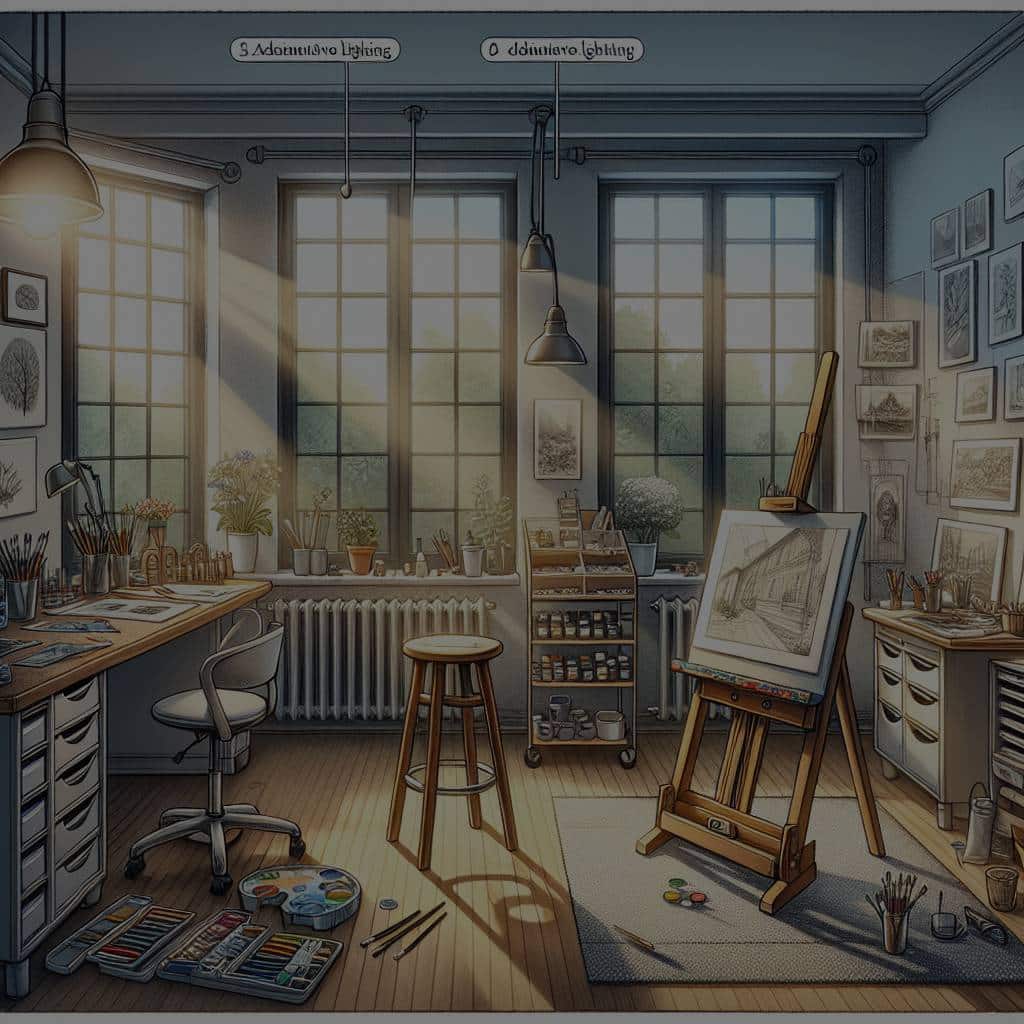
Importance of Natural Light
Natural light plays a pivotal role in painting. It illuminates the workspace and provides artists with a clear vision of their work. Unlike artificial lighting, natural light doesn’t alter the color of the paint, allowing for more accurate color representation in paintings.
In parallel : What’s the Best Way to Create a Seamless Transition Between Indoor and Outdoor Kitchens?
When setting up your home studio, consider the availability of natural light. Your studio should ideally be located in a space with large windows or skylights. If this isn’t feasible, you can still maximize the natural light available by using mirrors to reflect the light into your studio.
When working with natural light, remember that it changes throughout the day. The intensity and color of natural light can affect how colors appear. The morning light is soft and warm while midday light is bright and bluish. The evening light, on the other hand, can be quite warm and golden.
Also to read : How Can You Design a Bullet Journalist’s Dream Workspace Filled with Creative Storage?
Adding Artificial Lighting
While natural light is optimal for painting, it may not always be sufficient, especially during early mornings, late evenings, or overcast days. In such cases, artificial lighting comes in handy.
LED and fluorescent lights are the most common artificial light sources for a home art studio. LED lights are energy-efficient and have a high Color Rendering Index (CRI), which means they accurately represent colors. On the other hand, fluorescent lights are affordable, readily available, and emit less heat compared to other light sources.
When choosing artificial lighting, consider the light’s color temperature. Measured in Kelvins (K), color temperature refers to the warmth or coolness of the light. A light source with a low color temperature will cast a warm, yellowish light, while a high color temperature will cast a cool, bluish light.
Remember, your artificial lights should complement the natural light in your space, not overpower it. Adjust the position and intensity of your lights to create a balanced and well-lit workspace.
Planning the Lighting Layout
Creating the perfect lighting environment in your home studio involves more than just picking the right light bulbs. You need to thoughtfully plan out your lighting layout to ensure that every corner of your studio is well-lit.
Your main source of light, ideally a window, should be to your side to prevent casting shadows onto your work. Additional lights should be positioned to achieve a balanced brightness across your workspace.
It’s also essential to consider your painting style and preferred working conditions. For instance, if you paint small, intricate pieces, you might need a focused task light.
Controlling Light and Minimize Glare
Too much light can be just as problematic as not enough light. Excessive light can cause glare, making it hard for you to see your work and potentially straining your eyes.
To control the amount of light in your studio, use window treatments such as blinds or curtains. These allow you to regulate the amount of natural light entering your workspace. For artificial lights, consider installing dimmer switches so you can adjust the light level as needed.
Remember to position your easel or work surface at a right angle to your light source to minimize glare. Keep the surface of your painting slightly tilted to reduce reflections.
Maintaining Color Consistency
Maintaining color consistency in your artwork is crucial, and lighting plays a significant role in this regard. As we’ve discussed, the color and temperature of your light can influence how colors appear.
To ensure color accuracy, use light bulbs with a high CRI. CRI measures a light source’s ability to reveal the actual color of objects compared to a natural light source. A bulb with a CRI of 80 or higher is desirable for color-critical tasks like painting.
In addition, consider using daylight bulbs. These bulbs are designed to mimic the color properties of natural daylight, providing a neutral light that allows for accurate color perception.
In the end, remember that setting up the perfect lighting for your home art studio is a process of trial and error. It’s about finding the right balance of natural and artificial light that works best for your specific needs. Enjoy the process and happy painting!
The Role of North Light in a Home Art Studio
The term north light is often tossed around in the art world, with many experienced artists swearing by its benefits. But what exactly is north light and why is it so sought after for studio lighting?
North light refers to the soft, diffused light that comes from the north-facing windows. This light is consistent throughout the day, with minimal changes in color temperature and intensity. This consistency makes north light the most preferred natural light source for many artists as it allows for accurate color rendering.
A north-facing window can provide an ample amount of north light in your home art studio. However, not all homes have this convenience. If your studio doesn’t have access to north light, don’t worry. You can still simulate it using artificial lighting. Full spectrum bulbs, which mimic the color properties of natural light, are a great choice.
When setting up your north light, be sure to consider the time you typically paint. If you tend to paint in the afternoon or evening, you may want to supplement your north light with additional light sources to maintain consistent lighting.
Incorporating Reflective Surfaces for Better Lighting
The use of reflective surfaces is another effective technique to enhance the lighting in your home art studio. Reflective surfaces such as mirrors or white walls can help bounce light around the room, ensuring every corner of your studio gets sufficient light.
When using mirrors, position them strategically to reflect light onto your workspace. Be mindful not to place them directly opposite your light source, as this can result in an overly bright and glaring light.
On the other hand, painting your walls a light color, preferably white, can significantly improve your studio lighting. Light colors reflect more light than dark ones, helping to diffuse light throughout the studio. This can help to achieve a soft, evenly-lit workspace that’s ideal for painting.
Remember, the goal is to create a well-lit, comfortable workspace where you can fully express your creativity. It’s about finding the best combination of light sources, be it natural light, artificial light, or a combination of both, that best fits your artistic needs.
Conclusion: Creating Your Perfect Home Art Studio
Lighting is undeniably one of the most essential elements in setting up a home art studio. But remember, achieving the perfect studio lighting goes beyond merely illuminating your workspace. It involves understanding the different light sources, their color temperature, and how they affect your painting process.
From natural light to artificial lighting, to the preferred north light, each light source offers unique benefits. Incorporating reflective surfaces can also enhance your studio lighting, creating a vibrant, comfortable space for your artistic endeavours.
Keep in mind that setting up your home art studio is an ongoing process of experimentation. It’s okay to make adjustments along the way. At the end of the day, it’s about creating a space that not only inspires creativity but also showcases your artwork in the best light.
So take this guide, apply the tips and techniques mentioned, and start setting up your ideal home art studio today. Let the power of good lighting illuminate your art journey. Happy painting!